Do you want to create automated website screenshots in your WordPress site? If you frequently add website screenshots to your WordPress posts or pages, then automating the process will save you time spent on capturing screenshots manually. In this article, we will show you how to create automated website screenshots in WordPress.

Method 1: Create Automatic Website Screenshots in WordPress using Plugin
This method is easier thus recommended for beginners and users who don’t want to deal with code.
First thing you need to do is install and activate the Browser Shots plugin. For more details, see our step by step guide on how to install a WordPress plugin.
The plugin works out of the box, and there are no settings for you to configure.
Simply edit a post/page or create a new one. You will notice a new button in the visual editor to add website screenshots.

Clicking on it will bring up a popup where you can enter the website URL, alternate text, link to URL, and height / width of the screenshot.

Click on OK button and the plugin will add a shortcode to your WordPress post. You can now preview your post to see the plugin in action.
If you are using the Text Editor in WordPress or don’t want to use the button in visual editor, then you can also manually add the shortcode yourself.
[browser-shot url=""]
By default, the plugin will create a screenshot of 600 x 600 pixels. You can change that by adding the width and height attributes to the shortcode.
[browser-shot url="" width="400" height="400"]
It will also automatically link to the website. You can change that by adding a link attribute to the shortcode and add any link you want.
[browser-shot url="" width="400" height="400" link="http://example.com"]
If you want to add a caption below the screenshot, then you can do that by wrapping the caption text around the shortcode.
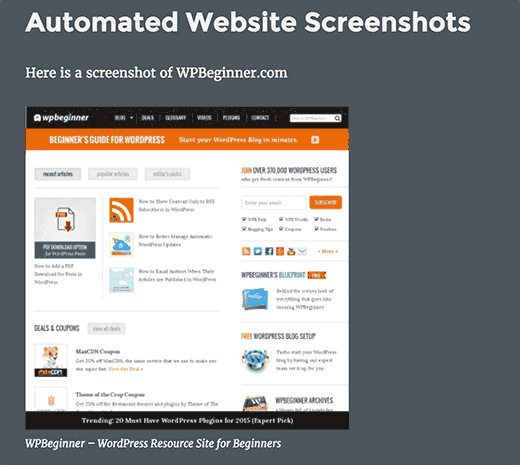
[browser-shot url=""]WPBeginner - WordPress Resource Site for Beginners[/browser-shot]
The caption will use your WordPress theme’s caption styles. Here is how it looked on our demo website:

Browser Shots plugin uses WordPress.com’s mshots API to generate screenshots on the fly. These images are not stored in your WordPress media library. They are served directly from WordPress.com servers.
See our guide on the difference between WordPress.com and WordPress.org.
Method 2: Create Automated Screenshots by Adding Code to WordPress
This method requires you to add code to your WordPress files. It is not recommended for beginners. If you are comfortable pasting snippets from web into WordPress, then you can use this method.
Simply add this code to your theme’s functions.php file or a site-specific plugin.
function wpb_screenshots($atts, $content = NULL) { extract(shortcode_atts(array( "snap" => 'http://s.wordpress.com/mshots/v1/', "url" => '', "alt" => 'screenshot', "w" => '600', // width "h" => '450' // height ), $atts)); $img = '<img alt="' . $alt . '" src="' . $snap . '' . urlencode($url) . '?w=' . $w . '&h=' . $h . '" />'; return $img; } add_shortcode("screen", "wpb_screenshots");
Similar to the plugin we mentioned earlier, this code also uses the WordPress.com mshots API to generate screenshots on the fly.
To display a website screenshot in your WordPress posts and pages, you will need to enter the shortcode like this:
[screen url=”http://wpbeginner.com” alt=”WPBeginner”]
Replace URL and Alt fields with your own values.
By default, this code will generate a screenshot of 600 x 450 pixels. You can change that by adding your own height and width attributes to the shortcode.
[screen url=”http://wpbeginner.com” alt=”WPBeginner” w=”400″ h=”400″]
That’s all, we hope this article helped you learn how to create automated website screenshots in WordPress. You may also want to see our guide on how to automate WordPress and social media with IFTTT.
If you liked this article, then please subscribe to our YouTube Channel for WordPress video tutorials. You can also find us on Twitter and Facebook.
