How to Manage Pages in WordPress using Advanced Page Manager
Often users mainly use pages to build their WordPress sites (see the difference between posts and pages in WordPress). This allows them to build a static site with an optional blog page. However, it becomes harder to manage pages using the default interface on a larger site. In this article, we will show you how to manage pages in WordPress using Advanced Page Manager.
First thing you need to do is install and activate the Advanced Page Manager plugin. The plugin works out of the box and there are no settings for you to configure. Simply go to Pages and see the plugin in action.

Advanced Page Manager changes the default Pages screen to make it more powerful for sites with lots of pages. It uses an Ajax based UI to perform page management tasks without reloading the page.
You will notice administration links below each page which allow you to quickly perform various actions without reloading the page.
It also changes page statuses into Online and Offline for published and unpublished pages. Clicking on Publish link below a page will change its status to online.
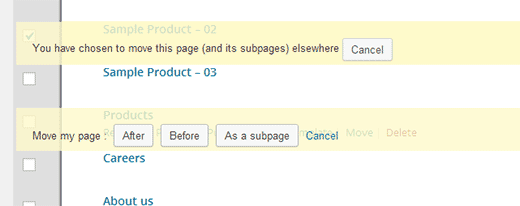
Managing parent and child pages also becomes easier. Simply click on the Move link below a page to change its position. For the front-end of your site, check out our tutorial on how to display a list of child pages for a parent page in WordPress.

You will also notice that instead of the one Add New button on the top of the Pages screen, there is now an Add New button next to every page. Clicking on the button allows you to add a new page right before, after, or as a subpage of a specific page. You can also choose number of pages you want to add, which allows you to add multiple pages at once.

We hope this article helped you efficiently manage pages on your WordPress site.
If you liked this article, then please subscribe to our YouTube Channel for WordPress video tutorials. You can also find us on Twitter and Google+.
