How to Create a Photo Gallery with Albums in WordPress

105

Have you ever wanted to organize your photo galleries with albums? While image galleries allow you to display multiple photos on a single page, albums can allow you to display multiple galleries on a single page categorized by event, topic, location, etc. This is extremely useful for photographers and photobloggers. In this beginner’s guide, we will show you how to create a photo gallery with albums in WordPress without writing a single line of code.

Video Tutorial

Subscribe to WPBeginner

If you don’t like the video or need more instructions, then continue reading.

First, you need to install and activate the Envira Gallery plugin. Upon activation, you will be asked to enter your license key. Once you are done activating, you need to visit Envira Gallery » Settings and click on the Addons tab.

Install and activate albums and standalone addons for Envira

From the Addons tab, you need to install and activate: Albums and Standalone addon. You will need both of these addons to create a photo albums gallery in WordPress.

Before you can create albums, you will also need to create image galleries. Here is a step by step guide on how to create responsive image galleries in WordPress with Envira.

After you have created your image galleries, you need to visit Envira Gallery » Albums and click on the Add New button.

Creating a new album in Envira

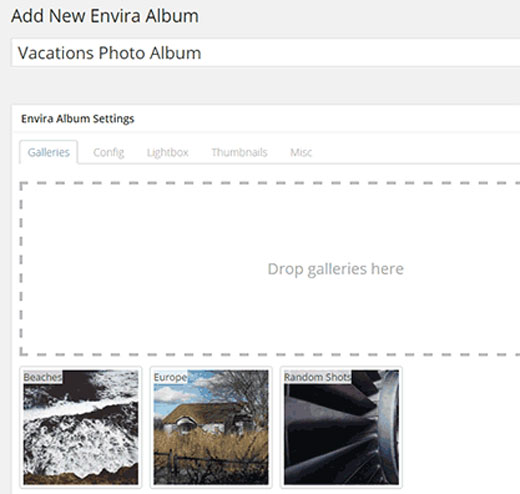
Creating an album in Envira is similar to creating a gallery. The only difference is that instead of uploading images, you drag and drop your galleries.

Add New Albums in Envira

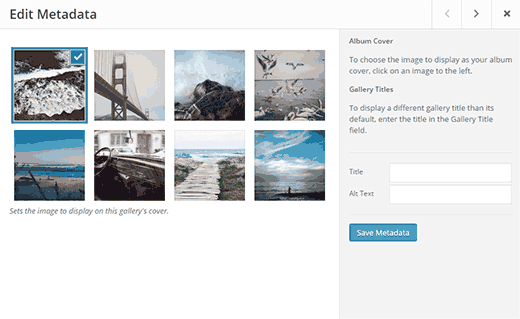
After adding your galleries, you will see an info icon for each gallery. You can click on it to change the gallery cover and meta data.

Changing gallery cover and meta data

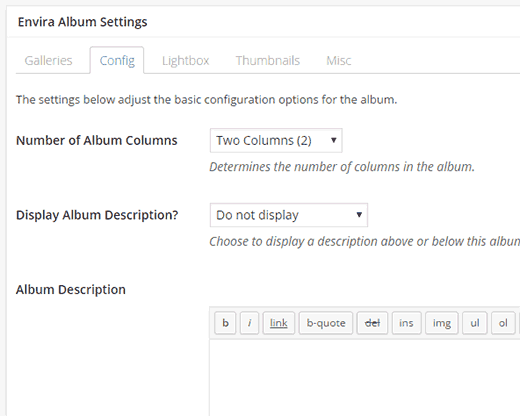
You can also choose how your albums appear by clicking on the Config tab in Envira album settings.

Configuring album appearance

If you want your albums to open directly inside a lightbox, then you can click on the Lightbox tab.

Lightbox album

Once you are done configuring your album, simply click on the publish button to store your album settings.

Your album is now ready, and you can add it into a post or page. Simply create a new post or edit an existing one. You will see a new Add Album button on the post editor next to the Add Gallery button.

Adding album into post or page

Clicking on the Add Album button will bring up a pop-up where you can select the album you just created.

Select photo album

That’s all, you can now visit your website and see your album in action.

If you have been using NextGEN image gallery to create your albums, then you may want to check out our guide on how to switch from NextGEN to Envira Gallery in WordPress.

If you liked this article, then please subscribe to our YouTube Channel for WordPress video tutorials. You can also find us on Twitter and Google+.