How to Exclude Pages from WordPress Search Results (Step by Step)
Do you want to learn how to exclude pages from the WordPress search results?
By default, the internal search on your WordPress site will include all posts and pages in the search results. To make it easier for your site visitors to find what they’re looking for, you may want to exclude certain content, so it never appears in those results.
In this article, we’ll show you how to exclude certain pages from the WordPress search results, step by step.

Why Exclude Pages from WordPress Search Results?
The default WordPress site search includes all of your posts, pages, and custom post types in the search results. This works well enough for many WordPress website owners.
However, if you’re running an online store, then you may want to hide pages like your account page, checkout page, thank you page, and more.
The same goes for those running membership websites or online courses. You may want to hide subscriber-only content from appearing in search.
With that said, let’s show you how to exclude pages from your sitewide WordPress search results.
Note: This guide covers on-site search results, when a visitor to your website uses a search box to search through your website content. If you’re looking to exclude pages from Google search results, then you should see our guide on how to hide a WordPress page from Google.
Create a New WordPress Search Algorithm with a WordPress Plugin
The easiest way to exclude pages from the WordPress search results is by using the SearchWP plugin. It’s the best search plugin for WordPress used by over 30,000 websites.
It’s very easy to use and gives you complete control of your WordPress search results.
First thing you need to do is install and activate the plugin. For more details, see our step by step guide on how to install a WordPress plugin.
Upon activation, navigate to Settings » SearchWP and then click the ‘License’ menu option.

Then, you can enter your license key into the ‘License’ box and click the ‘Activate’ button. You can find this information in your account on the SearchWP website.
After that, you need to click on the ‘Engines’ menu option.

This takes you to a page where you need to set your default search engine settings. Think of it like creating your own Google search algorithm that’s only for your website.
With SearchWP, you need to create a sitewide search engine before you can start excluding pages from the WordPress search results.
You can change the search engine settings by clicking on the ‘Posts’, ‘Pages’, ‘Media’, and other custom post type drop downs.
Each section has a weight multiplier that will change how the search engine ranks your website’s content.
For example, if you move the ‘Title’ slider down and the ‘Content’ slider up, then the content will hold more value than the title.

You can also completely remove all pages from appearing in the WordPress search here.
Simply click the ‘Remove’ button in the ‘Pages’ section.

This brings up a popup where you need to uncheck the ‘Pages’ box.
Then, click the ‘Done’ button to remove all pages from appearing in search.

After you’re done customizing the default search engine settings, you need to click the ‘Save Engines’ button to create your first engine.

Exclude Specific Pages From the WordPress Search Results
If you only want to exclude specific pages from the search results on your website, then this section is for you.
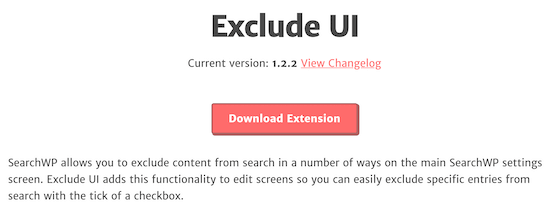
To do this, we’ll be using the Exclude UI extension from SearchWP. When you’re logged into your SearchWP account, go to the Exclude UI download page and click ‘Download Extension’.

Then, install and activate the extension as you would any other WordPress plugin.
After that, open up the page that you want to exclude from the search results.
Next, make sure the ‘Page’ option is selected in your right hand menu, and simply check the ‘Exclude from search’ checkbox.

Then click the ‘Update’ button, and that page will now be
hidden from the search results. Even if your visitors enter the exact title of the page into your search bar, it will not appear.
If you want to hide more individual pages from the search results, then simply follow the above steps again.
To exclude specific blog posts from WordPress search results, you can follow the same steps above. The only difference is that the right-hand menu will say ‘Post’ instead of ‘Page’.
We hope this article helped you learn how to exclude pages from the WordPress search results. You may also want to see our beginner’s guide on how to get a free SSL certificate for your website and our best business phone services for small businesses.
If you liked this article, then please subscribe to our YouTube Channel for WordPress video tutorials. You can also find us on Twitter and Facebook.
