
How to Run a Giveaway in WordPress with Rafflecopter
Recently, on WPBeginner’s 4th birthday, we ran the largest WordPress giveaway ever. Thanks to the wonderful companies and our users who participated in the giveaway, we were able to raise $25,000 to build a school. Some of our readers asked us how they can run giveaways on their own WordPress sites? Giveaways are a great way to increase user engagement and rewarding readers, while also promoting your brand and website. In this article, we will show you how to run a giveaway in WordPress with Rafflecopter.

Why use Rafflecopter to Create a Giveaway?
Rafflecopter provides a simple and easy way to run and manage a giveaway. At the same time, it also makes it easier for your users to join a giveaway with just a few clicks. You can set tasks for users to perform in exchange of entries into the giveaway. These tasks could be sharing content on social media channels, making comments, joining mailing list, etc. Each task spreads the word about your website and keeps your users engaged. You don’t need to edit any code or even install a plugin to add a Rafflecopter giveaway to your WordPress site.
How to Create a Rafflecopter Giveaway
Sign up for a Rafflecopter account. The basic account is free, but they do have paid plans with additional features. The business plan does not have Rafflecopter branding in the widget, and it also has some awesome features to boost the viral reach of a giveaway campaign. At WPBeginner, we signed up for the business plan, because we think it’s totally worth the price. However, if you are not a business user and just starting out then the free plan would work just fine.
After sign up you will be taken to Rafflecopter dashboard. Click on +New Giveaway to create your first giveaway.

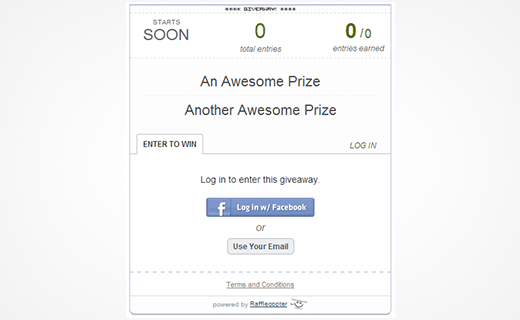
On the next page, you will see a form to create your giveaway. First thing you need to do is give a title for your giveaway. This will help you organize your giveaways on the Rafflecopter dashboard. Next, add the prizes you want to the giveaway. With the free account you can not add an image of the prize, but in most cases you don’t need to do that. Just add the list of prizes on your WordPress post or page where you are hosting the giveaway.

The next option is to choose how people can enter the giveaway. There is a checkbox to enable Refer a Friend option, this feature is available for business accounts only. Click on Add an Option to see a list of options that you can add. These are tasks that you can ask the user to perform to enter your giveaway. You can add multiple options and give your users opportunity to maximize their chances of winning while also spreading the word about your website.

With the free account you can add these options:
- Tweet about the giveaway. You can compose the tweet message add your website’s twitter handle and perhaps a URL to either the giveaway or to your website’s mainpage.
- Like a page on Facebook. You will be asked to provide the Facebook page URL and title.
- Follow an account on Twitter. Provide a twitter account that users will have to follow to earn an entry.
- Leave a comment on a blog post
- Create your own option. This allows you to create your own option. For example, you can ask users a simple question.
With a paid account you can add these options as well:
- Create a poll / Survey. Users can answer questions to enter giveaway.
- Join a mailinglist (business accounts only). Users can join your Mailchimp, Aweber, or Constant Contact lists.
- Users can pin an image on Pinterest.
- Follow on Pinterest.
After adding the entry options, the final step is to choose the start and end dates of your giveaway. The goal here is to allow the maximum number of your readers to join. We recommend that you run the giveaway for about 7-10 days, but you can choose any limit that you want.

Lastly, you need to enter terms and conditions of the giveaway and that’s all. You have successfully created your first giveaway.
Adding Rafflecopter Giveaway Widget in WordPress
Once you have created your giveaway, click on the Get Widget button. Rafflecopter will now give you a code which you can paste into WordPress to display the giveaway widget. Copy the code and go to your WordPress admin area. Create a new post or page for your giveaway. Switch to text editor mode and paste the code.

If you are using visual editor to create your posts, then you need to switch to text editor before you paste the Rafflecopter code. If the widget does not appear on your page or post, then refresh the page.
To edit your giveaway simply log on to your Rafflecopter account and edit your giveaway. You don’t need to update the code in your WordPress post or page because it will automatically reflect the changes you make in your Rafflecopter account.
Promote Your Giveaway
Giveaways are successful when you let all of your users know about it. We used the floating footer bar to promote our giveaway on all of our site pages.
We also sent out an email to all of our newsletter followers about entering the giveaway. We also shared our giveaway in social media as well as asked all of our friends to share it.
Last but not least, we added a prominent floating social bar on our giveaway posts, so others will share it.
Final Thoughts
Rafflecopter is good for 99% of the folks out there. Our giveaway was very unusual because we had 200+ prizes. Most giveaways have maximum of 10. If you have a lot of prizes (200+) like ours, then you will run into a few issues like we did. First, you will not be able to display the number of winners on the widget. But this is the least of your problem.
If you want to use the random winner picker on Rafflecopter, then prepare to work extra hard. There is no easy way to select random winners in bulk. We had to click on the Add Winner button 200+ times, so the contest is fair and each person gets equal chance of winning. Now again, this is not so bad when you only have 10 winners like most giveaways do.
Also, there is no easy way to export the list of winners. You can export all entries, but not all winners. We wanted to create a spreadsheet with each winner and prizes associated with the person for our records. We had to manually do that. This again is a specific issue with our giveaway. Doing it for 10 winners is not that bad, but 200 is.
We hope that Rafflecopter adds the button to choose winners in bulk and download winners list because even when you have 10 winners, this will save you some time.
We hope this article helped you start a fabulous giveaway on your WordPress site with Rafflecopter. At WPBeginner, we often giveaway cool WordPress products, so make sure to follow us on Twitter and Facebook to stay updated about our giveaways and other cool WordPress tutorials that we publish. For feedback and questions please leave a comment below.
